Overview
The article provides a step-by-step guide for administrators on how to use Zapier and Google Sheets to mass approve or reject challenges in Influitive, streamlining the review process and saving time. It emphasizes the need for a Premium Zapier account and details the procedure from extracting challenge IDs to configuring API calls for bulk actions, cautioning that these actions are irreversible.
Information
Prerequisites : You will need to have a Premium Zapier account in order to begin this process.
As an Administrator, you may sometimes feel that your 'Items To Review' section located on your Dashboard that is getting a bit out of hand. Within the application, your only option is to manually 'approve' or 'reject' the outstanding items to review which can be very disheartening when you have maybe over one hundred items!

There is a way to lighten the load here by building a small integration using Zapier that can be re-used to approve or reject items in bulk. At a high level, we will be extracting event Ids from Influitive and copying and pasting them into a Google Sheet which will trigger API calls to action the item to review. We will go through this in more detail below
Note: Approving/Rejecting is not reversible so make sure to make the appropriate action as Influitive will not restore the data as it was prior to the action being taken
Extracting IDs From Influitive Challenge
1. Go to Program > Challenges and find the Challenge you want to approve
2. Click the pencil icon and then Export Response Data from the resulting dropdown menu :

3. In the resulting excel sheet, the only column we are interested in 2 columns. First, filter the 'State' column for 'Corporate Confirmation' ie. ones awaiting a decision. Next, we are concerned with the 'Activity ID' column. These IDs are what we will use in our API call later on. Keep this sheet open as we will come back to it later.
Building Your Zap
Note : This article will run through the example of approving Challenges. The same instructions can be used to Reject Challenges with a minor tweak to the API URL Endpoint which you will see later.
Before we start on the Zap we will need to create a Google Sheet and all you need to do is add the title of 'ID" to the first column of the sheet, like this:

Now on to build the Zap. There will be 2 steps.
Step 1 - Google Sheet
1. In Zapier, click 'Make A Zap' and name it 'Bulk Approve Challenges'
2. Search for Google Sheets in the 'Choose App & Event' section and click the Google Sheets icon:

3. Next, select New Spreadsheet Row under the 'Choose Trigger Event'

4. Choose the Google Account you created the Sheet under. You may need to authenticate your Google Account here if you have not previously done so. Zapier will walk you through this simple process:

5. Choose your Sheet name from the dropdown. I have called mine 'Approvals'. You will also choose your worksheet from the dropdown which will be Sheet 1 by default if you have started with a fresh Google Sheet.

6. We will be prompted to perform a test now. Let's go back to the export from Influitive and grab the first ID as a test. Paste that into the cell underneath our 'ID' header. Make sure to click out of the cell after you have pasted the value in. Click Test & Continue .

7. Zapier should automatically move on to the second step now.
Step 2 - Making API Call To Influitive
1. This time search 'Webhooks' under Choose App & Event and click the 'Webhooks by Zapier' app.

2. Choose 'Custom Event' under Choose Action Event .

3. Fill out the information as you see in the image below paying special attention to the URL and Headers section:
- URL - To add the 'ID' dynamically look at this quick screen recording - https://recordit.co/ozdLOv4oAw
- Headers - Find your Authorization Token and X_ORG_ID from your hub - https:https://influitive-supportdesk.zendesk.com/hc/en-us/articles/15751238953490-Introduction-To-The-Influitive-API
Note : To 'reject' the challenges just replace 'approve' with 'reject' in the URL

4. Click Continue and Zapier will show you a summary of the API call before you confirm. You can click Test & Continue . You should now see a successful message:

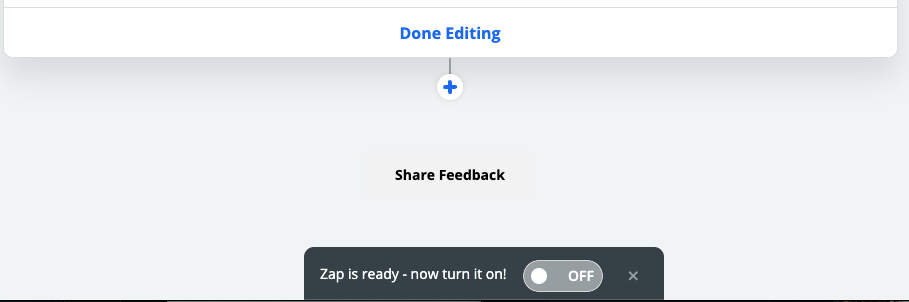
5. Let's confirm by going back to your hub! You should see the outstanding item should now be removed from the list and marked as approved. We can turn the Zap 'On' now, you will see the option at the bottom of the page:
6. Now we are ready to use it properly! Go back to your sheet and copy the entire column of Activity IDs and paste them into your Google Sheet underneath the ID you previously entered.
Note : Make sure to always add new IDs beneath the last ID you added. If you overwrite IDs previously entered this will not work anymore and you will need to create a fresh Google Sheet and link that to the zap
FAQ
Do I need a Premium Zapier account to use this mass approval/rejection process?
Yes, a Premium Zapier account is required to begin the mass approval or rejection process described in the article.
Is the action of approving or rejecting challenges reversible in Influitive?
No, once a challenge is approved or rejected, the action is irreversible and Influitive will not restore the data to its previous state.
How do I extract challenge IDs from Influitive for use in the API calls?
To extract challenge IDs, navigate to Program > Challenges in Influitive, select your challenge, click the pencil icon, and choose 'Export Response Data'. Then, filter the 'State' column for 'Corporate Confirmation' and use the 'Activity ID' column for the API calls.
Can the same process be used for both approving and rejecting challenges?
Yes, the same process can be used for both approving and rejecting challenges. To reject challenges, you simply replace 'approve' with 'reject' in the API call URL endpoint.
What should I do if I accidentally overwrite previous IDs in the Google Sheet?
If previous IDs are overwritten, you will need to set up a new Google Sheet and link it to the Zap again. Always add new IDs below the last one entered to avoid this issue.
Priyanka Bhotika
Comments